> ## Documentation Index
> Fetch the complete documentation index at: https://docs.jsonify.com/llms.txt
> Use this file to discover all available pages before exploring further.
# Understanding the Basics
> Learn the core components of Jsonify: Workflows, AI Agents, and Blocks.
Before you start building, let's clarify the fundamental concepts you'll encounter in Jsonify. Understanding these will make creating your automations much easier.
## Core Components
### 1. Workflows
Think of a **Workflow** as the master plan or recipe for your automation. It's a sequence of actions that you define for an AI Agent to follow. Each workflow is designed to achieve a specific goal, like extracting all product reviews from a site or finding contact information for a list of companies. You build workflows visually in the Workflow Editor.
### 2. AI Agents
An **AI Agent** is your digital worker. It's an AI equipped with its own browser instance that executes the steps defined in your workflow. When you run a workflow, Jsonify assigns one or more AI Agents to carry out the tasks, navigating websites, interacting with elements, and extracting data just like a human would, but much faster and at scale.
### 3. Workflow Blocks
**Blocks** are the individual instructions or steps within a Workflow. Each block performs a specific action, such as:
* `Open Websites`: Tells the agent which website(s) to visit first.
* `Extract Data`: Instructs the agent on what specific information to find and save.
* `Interact with Page`: Allows the agent to click buttons, fill forms, or perform other interactions.
* `Find Links`: Directs the agent to locate specific links on a page.
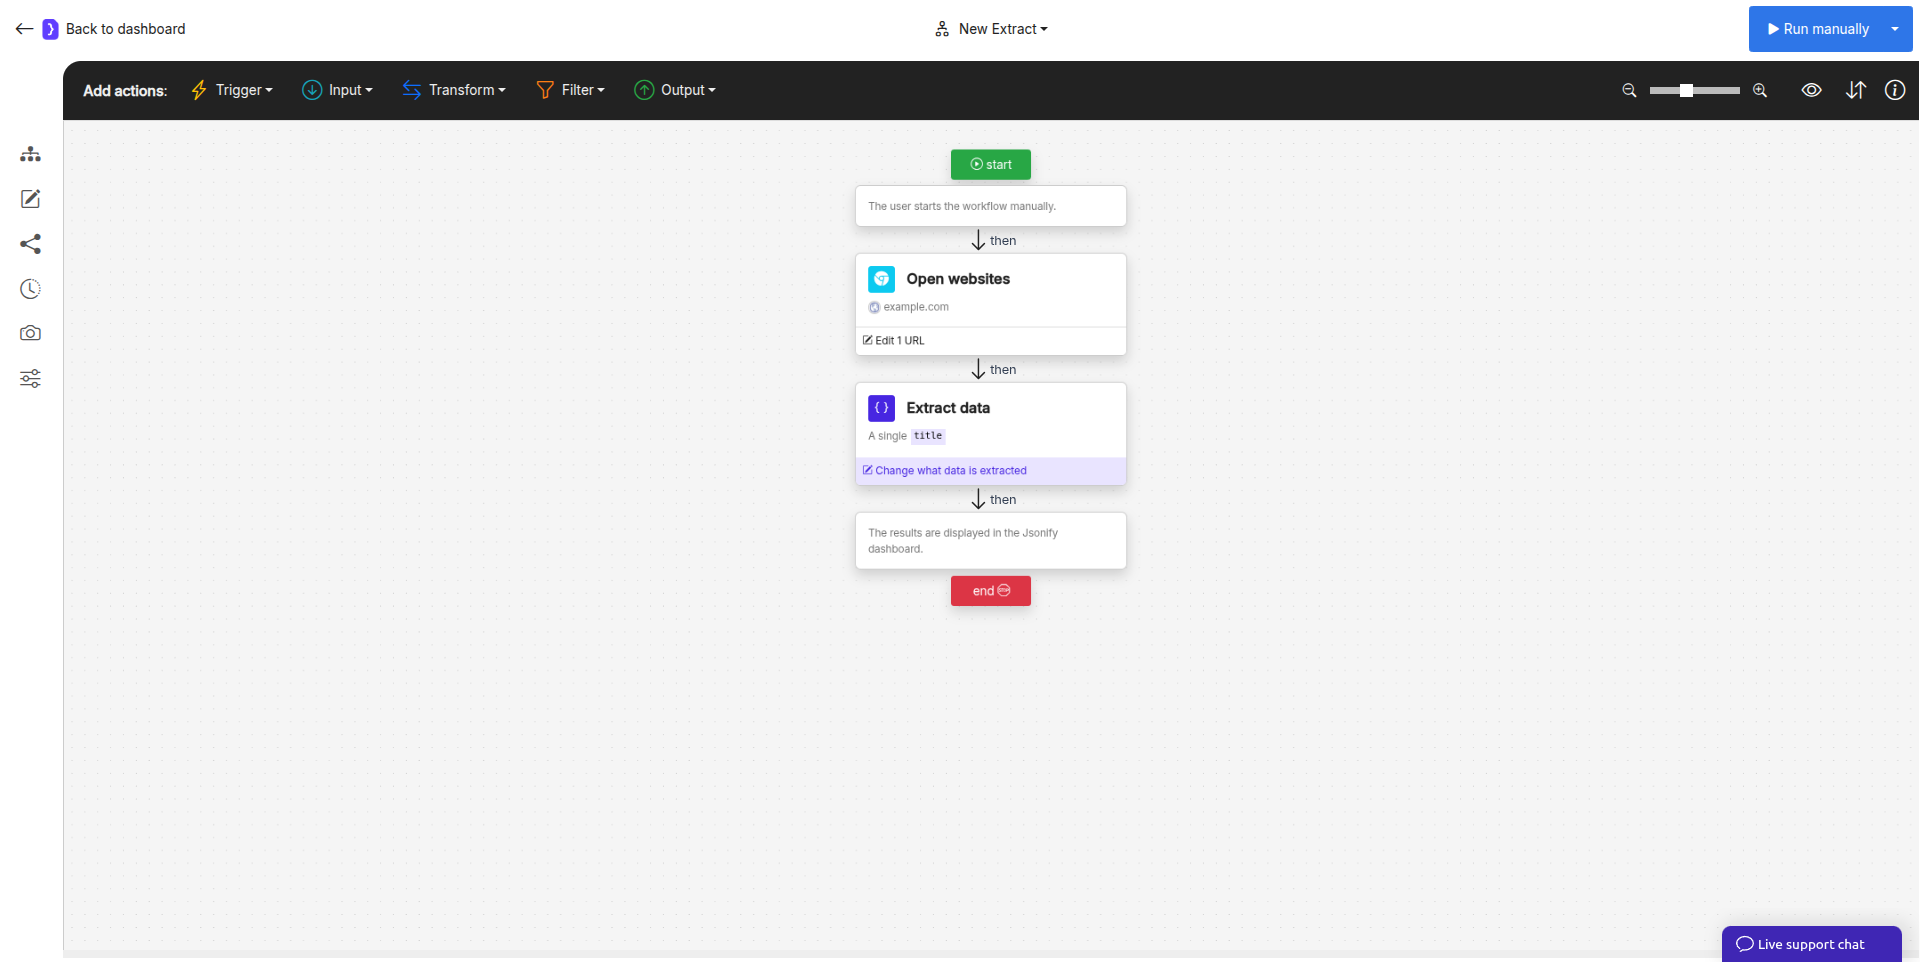
You combine these blocks sequentially in the Workflow Editor to build your automation logic.
## The Workflow Editor
This is your main workspace for creating and modifying workflows. Here's a quick overview:
* **Canvas:** The central area where you visually arrange your workflow blocks.
* **Block Panel:** (accessible via a '+') Contains all available blocks you can use onto the canvas.
* **Configuration Panel:** When you select a block on the canvas, this panel appears, allowing you to set its specific parameters (e.g., entering URLs for `Open Websites`, defining data fields for `Extract Data`).
*
 ## Running Workflows & Getting Results
Once your workflow is built:
1. **Run:** You initiate the workflow via a "Run" button. Jsonify assigns AI Agents to start executing the steps.
2. **Monitor:** You can monitor the progress in real-time.
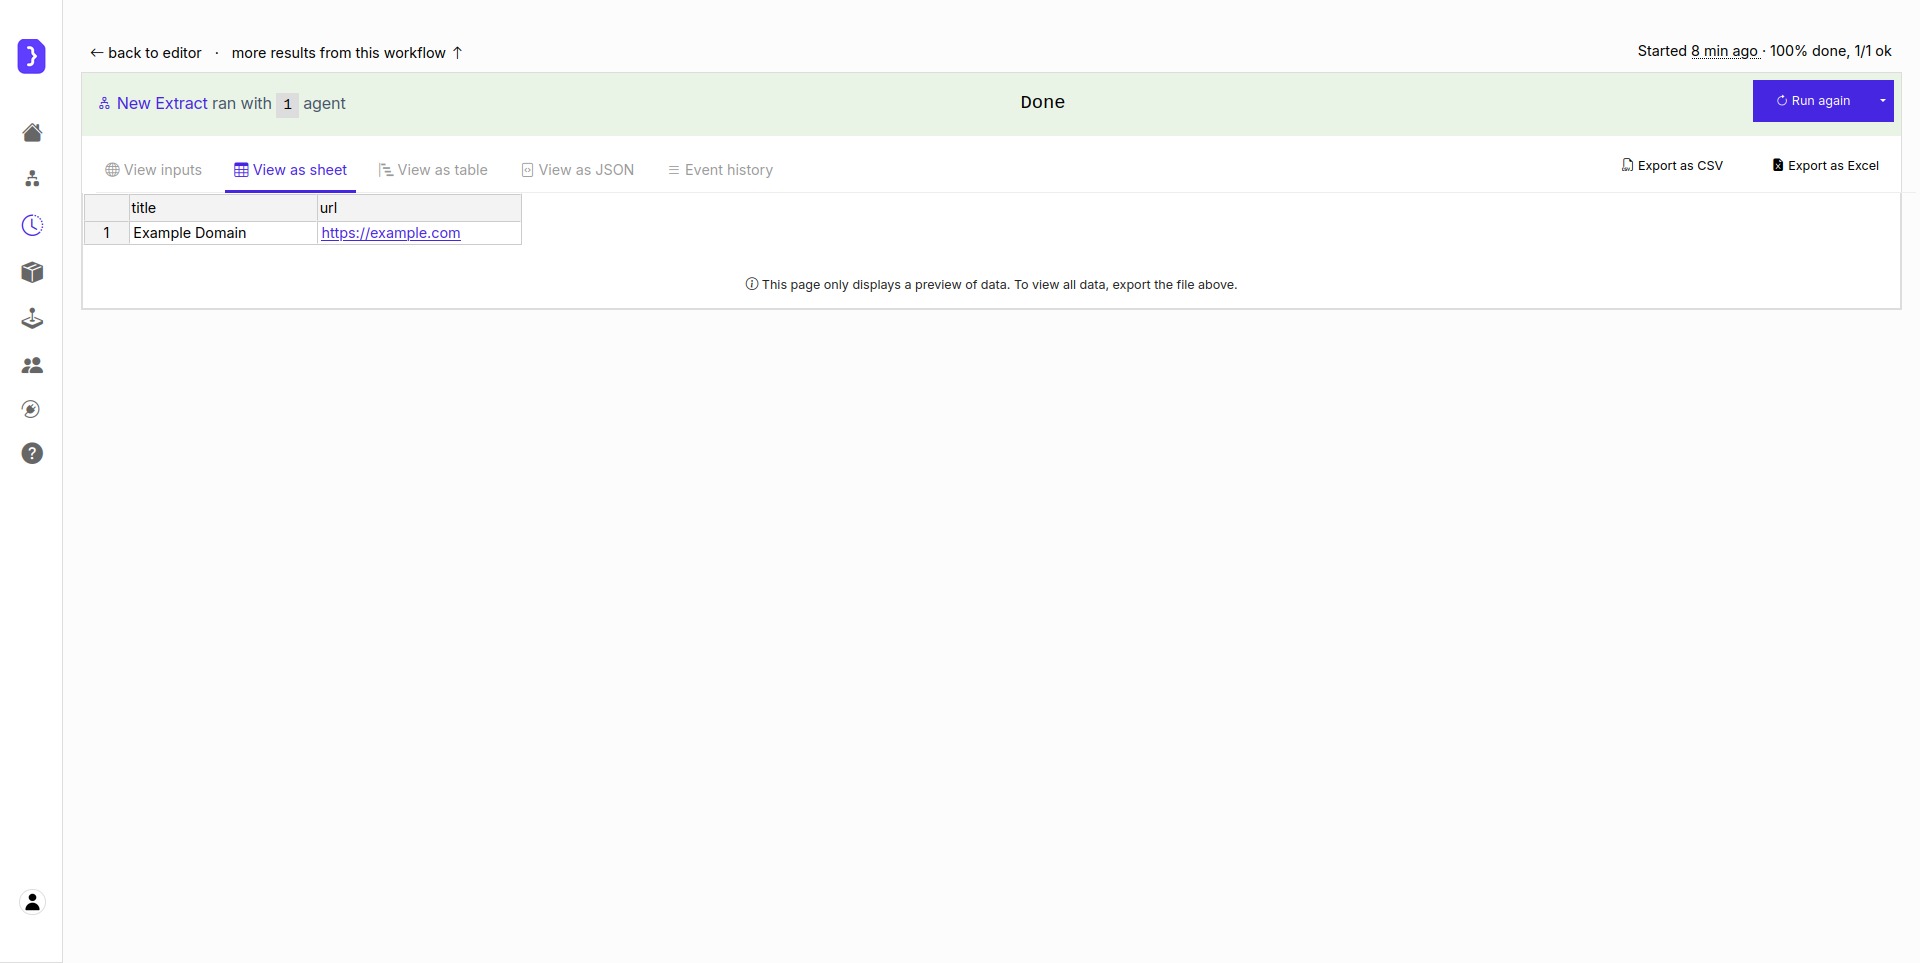
3. **Results:** When the workflow completes, the data extracted or generated by the AI Agents is collected and made available in your **Dashboard**, in formats like tables (JSON/CSV) ready for download or further analysis.
## Running Workflows & Getting Results
Once your workflow is built:
1. **Run:** You initiate the workflow via a "Run" button. Jsonify assigns AI Agents to start executing the steps.
2. **Monitor:** You can monitor the progress in real-time.
3. **Results:** When the workflow completes, the data extracted or generated by the AI Agents is collected and made available in your **Dashboard**, in formats like tables (JSON/CSV) ready for download or further analysis.
 Now that you understand these basics, you're ready to build your first workflow!