The Challenge: Login Walls
Many websites protect valuable information behind a login wall. When you try to access a page like a personal dashboard or a profile, the site first checks if you are authenticated. This presents a challenge for automation, as the AI agent, by default, is a “guest” and cannot log in on its own.The Solution: Securely Stored Session Cookies
When you log into a website, it stores small pieces of data called cookies in your browser. These cookies act like a temporary key for your session. Jsonify allows you to securely store these cookies in a central Credential Store and then use them in any workflow. This method is secure, as your cookies are not exposed directly in the workflow, and reusable.Step 1: Export Cookies as a File
First, you need to export your active login session from your browser into acookies.txt file. We recommend using a simple, open-source browser extension for this.
- Install the “Get cookies.txt LOCALLY” Extension. Install this extension from the Chrome Web Store.
- Log into the Target Website. In your Chrome browser, navigate to the website you want to automate (e.g.,
pinterest.com) and log in with your credentials. - Export the Cookies File. Once logged in, click the extension’s icon in your toolbar and export
cookies.txtfile by clicking ‘Export’.
Step 2: Create a Website Credential Store
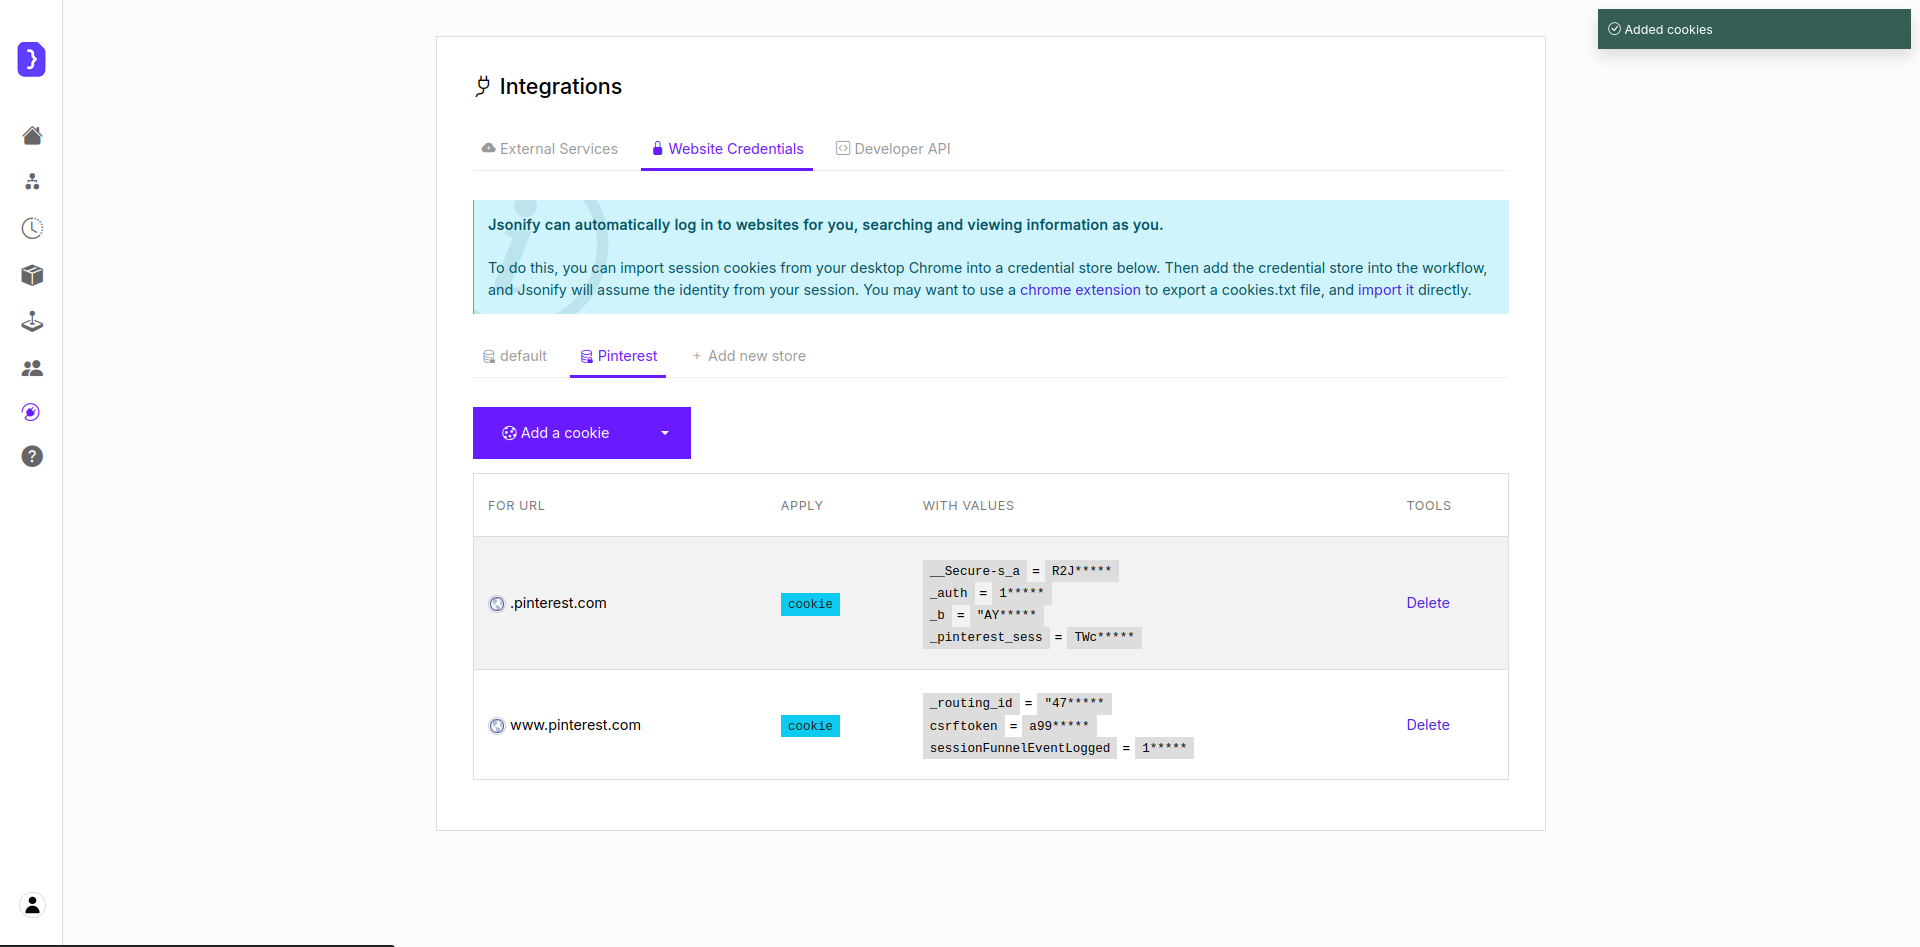
Next, you need to upload the exportedcookies.txt file into Jsonify’s secure credential manager.
- Navigate to Integrations. From your main dashboard, in the menu on the left, go to the
Integrationssection. - Select Website Credentials. Open the
Website Credentialstab. - Create a New Store. Click the
+ Add credentialsbutton. A new, untitled credential store will be created. - Import the Cookies File. Click the dropdown menu (
▼) on the right side of ‘add a cookie’ button and selectImport cookies.txt. Upload the file you downloaded in Step 1. - Rename the Store. Give your credential store a descriptive name, for example, “Pinterest”.
Importing the cookies.txt file into a newly created Website Credential store.
Step 3: Use Credentials in a Workflow
Now you can use your stored session in any workflow.Add the Use Credentials Block.In your workflow editor, add theInput ➙ Advanced ➙ Use Credentialsblock. This block should be placed before navigating to the protected page.- Select Your Credential Store. In the block’s settings, click the dropdown menu and select the credential store you created earlier (e.g., “Pinterest”).

Selecting the named credential store from the dropdown in the 'Use Credentials' block.
Full Example: Scraping Your Pinterest Boards
Let’s build a workflow that scrapes the names of your personal boards on Pinterest.Use Credentials Block:- Start your workflow with this block.
- Select “Pinterest” from the dropdown.
Open Websites Block:- URL: Enter the direct URL to your Pinterest profile’s “Saved” tab (e.g.,
https://www.pinterest.com/YOUR_USERNAME_HERE/saved/). - The agent is now equipped with your login session and will be able to access this page.
- URL: Enter the direct URL to your Pinterest profile’s “Saved” tab (e.g.,
Extract Data Block:- Extract the
board_namefrom the list of items on the page.
- Extract the
Best Practices & Key Considerations
- Security: Storing cookies as credentials is much more secure than pasting them directly into a workflow. The data is encrypted and managed centrally.
- Reusability: You can use the same credential store across multiple workflows. If your cookies expire, you only need to update them in one place.
- Expiration: Cookies have a limited lifespan. If your workflow suddenly fails, it likely means your session has expired. Simply re-export a new
cookies.txtfile and re-upload it to the same credential store to update it.