> ## Documentation Index
> Fetch the complete documentation index at: https://docs.jsonify.com/llms.txt
> Use this file to discover all available pages before exploring further.
# Tutorial 3: Turning Website Content into an FAQ
> Learn how to use Jsonify to analyze website content and automatically generate a list of Frequently Asked Questions (FAQs).
This tutorial demonstrates a powerful application of Jsonify: analyzing the content of a website (or specific pages) and using its AI capabilities to generate a structured list of Frequently Asked Questions (FAQs) along with their answers.
## Goal
To automatically create a set of relevant FAQs based on the textual content of one or more webpages. This involves:
1. Opening the target website(s).
2. Allowing the AI to explore and understand the content of these pages.
3. Instructing the AI within the `Extract Data` block to generate questions and answers based on the gathered information.
## Key Blocks Used
* `Open Websites`
* `Explore Content` (optional, but helpful for broader site analysis)
* `Extract Data` (with generative instructions)
## What You'll Learn
* How to instruct the AI to explore a website to gather comprehensive information.
* How to write prompts for the `Extract Data` block to generate new content (FAQs) instead of just extracting existing text.
* A practical example of leveraging generative AI within a Jsonify workflow.
## Steps
### 1. Create a New Workflow
* Navigate to your Jsonify **Dashboard**.
* Click the button sequence to create a new workflow: **Create an empty workflow ➙ Extract**.
* This template will include `Open Websites` and `Extract Data`. We may add `Explore Content`.
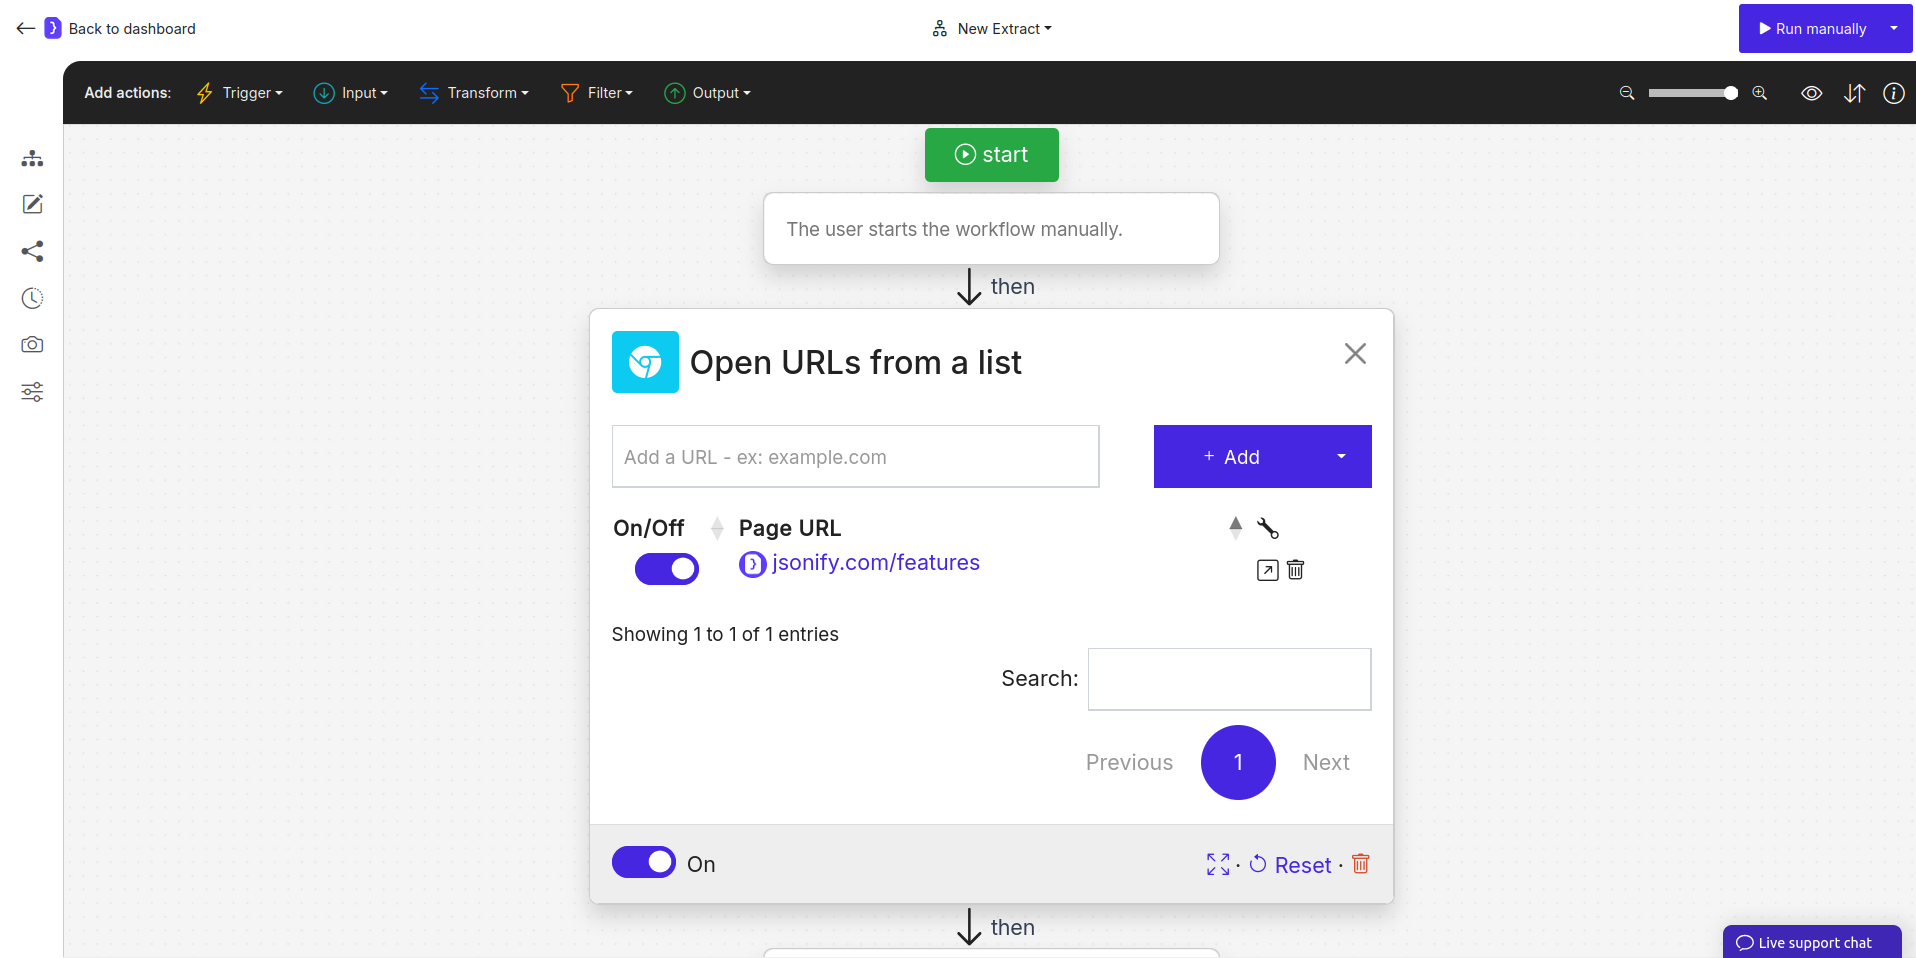
### 2. Configure `Open Websites` Block
* Select the `Open Websites` block.
* Add the URL(s) of the website(s) you want to turn into an FAQ. For this example, let's imagine we want to create an FAQ for Jsonify's own website (or a specific section of it).
* Example URL: `https://jsonify.com/features` (or any content-rich page)
* If adding multiple starting pages, list them here.
* Ensure the toggle switch next to each URL is **ON**.
 ### 3. Add and Configure `Explore Content` Block
* If you want the AI to gather information from more than just the initial page(s) listed in `Open Websites`, add an `Explore Content` block. This helps the AI get a broader understanding.
* To add the block:
1. Look at the **block categories at the top of the editor**.
2. Select the **Transform** category.
3. From the dropdown, click **`View More`** and select **`Explore Content`**.
4. Click the **+** icon on the canvas after `Open Websites`.
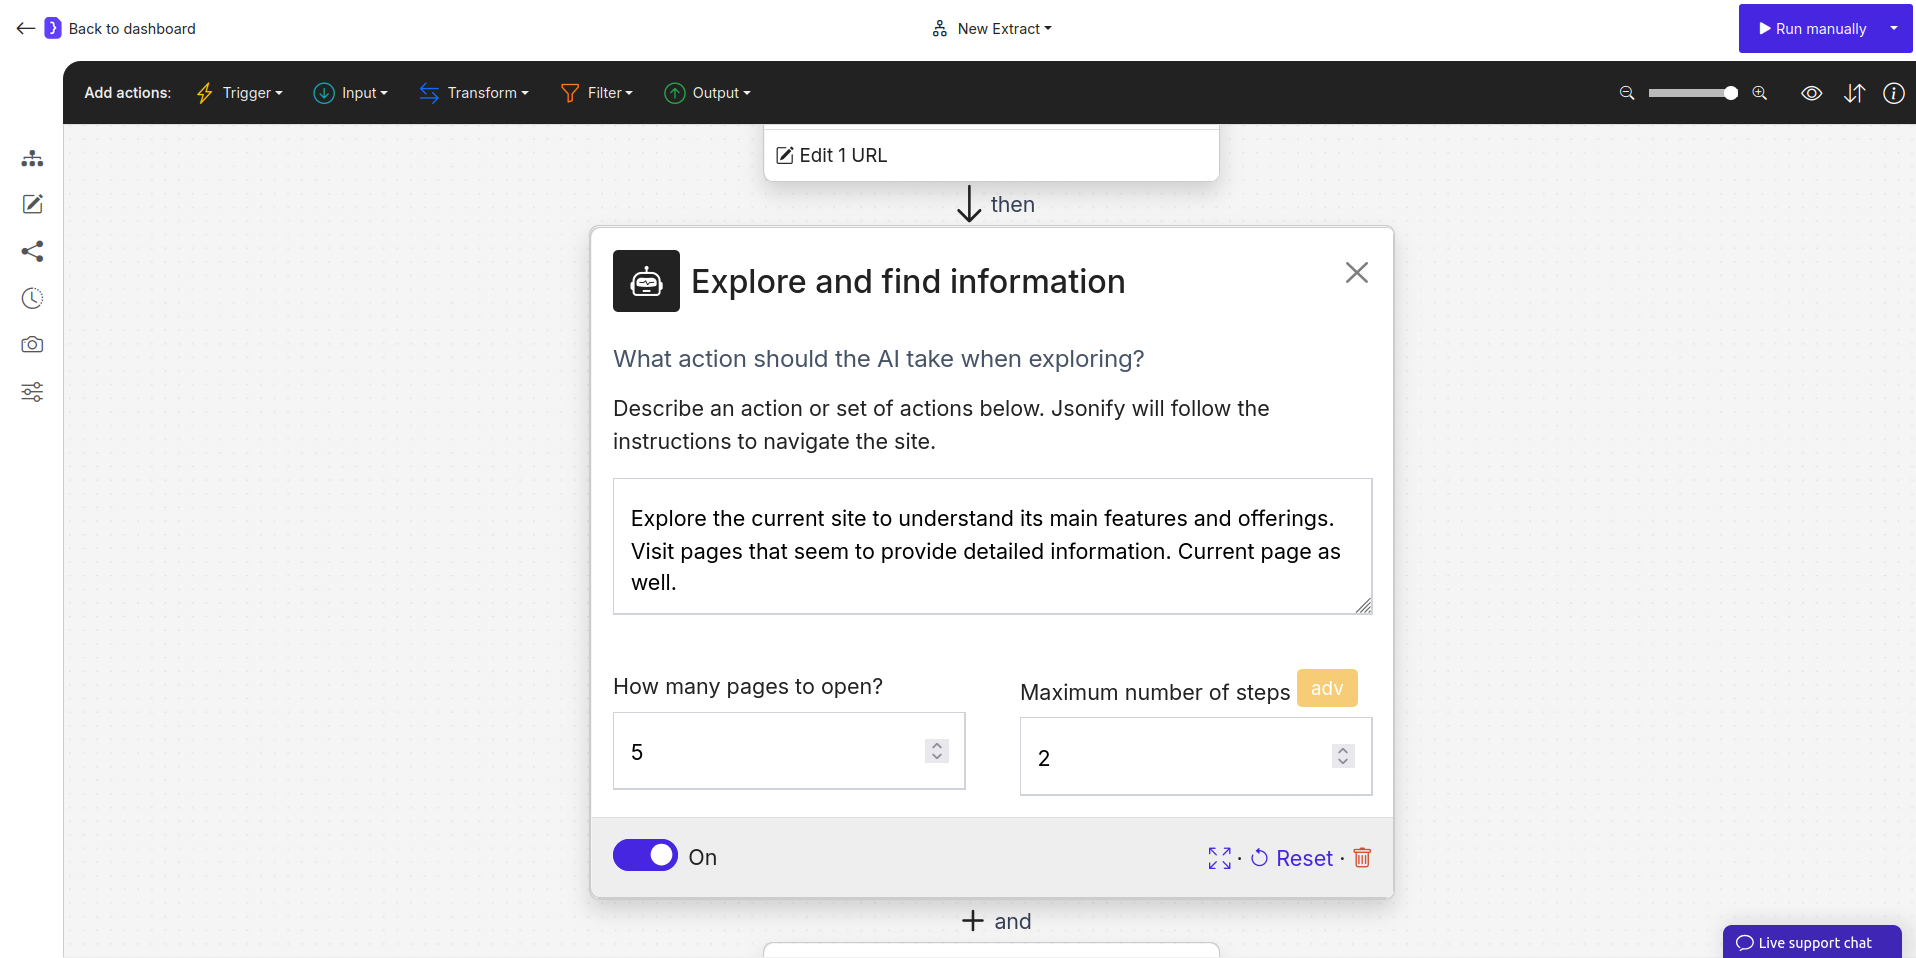
* Select the `Explore Content` block to configure it:
* **Describe an action...:** `Explore the current site to understand its main features and offerings. Visit pages that seem to provide detailed information. Current page as well`
* **How many pages to open?:** The maximum number of pages you can specify is `50`. However, for most cases, `5` to `10` pages will be sufficient..
* **Maximum number of steps:** The same applies to the nuber of steps: the maximum is `50`, but in most cases, you can specify `1` or `2`.
### 3. Add and Configure `Explore Content` Block
* If you want the AI to gather information from more than just the initial page(s) listed in `Open Websites`, add an `Explore Content` block. This helps the AI get a broader understanding.
* To add the block:
1. Look at the **block categories at the top of the editor**.
2. Select the **Transform** category.
3. From the dropdown, click **`View More`** and select **`Explore Content`**.
4. Click the **+** icon on the canvas after `Open Websites`.
* Select the `Explore Content` block to configure it:
* **Describe an action...:** `Explore the current site to understand its main features and offerings. Visit pages that seem to provide detailed information. Current page as well`
* **How many pages to open?:** The maximum number of pages you can specify is `50`. However, for most cases, `5` to `10` pages will be sufficient..
* **Maximum number of steps:** The same applies to the nuber of steps: the maximum is `50`, but in most cases, you can specify `1` or `2`.
 ### 4. Configure `Extract Data` Block (The Generative Step)
* This is where the FAQ generation happens. The `Extract Data` block will process the content from the page(s) visited (either directly from `Open Websites` or after `Explore Content`).
* Select the `Extract Data` block.
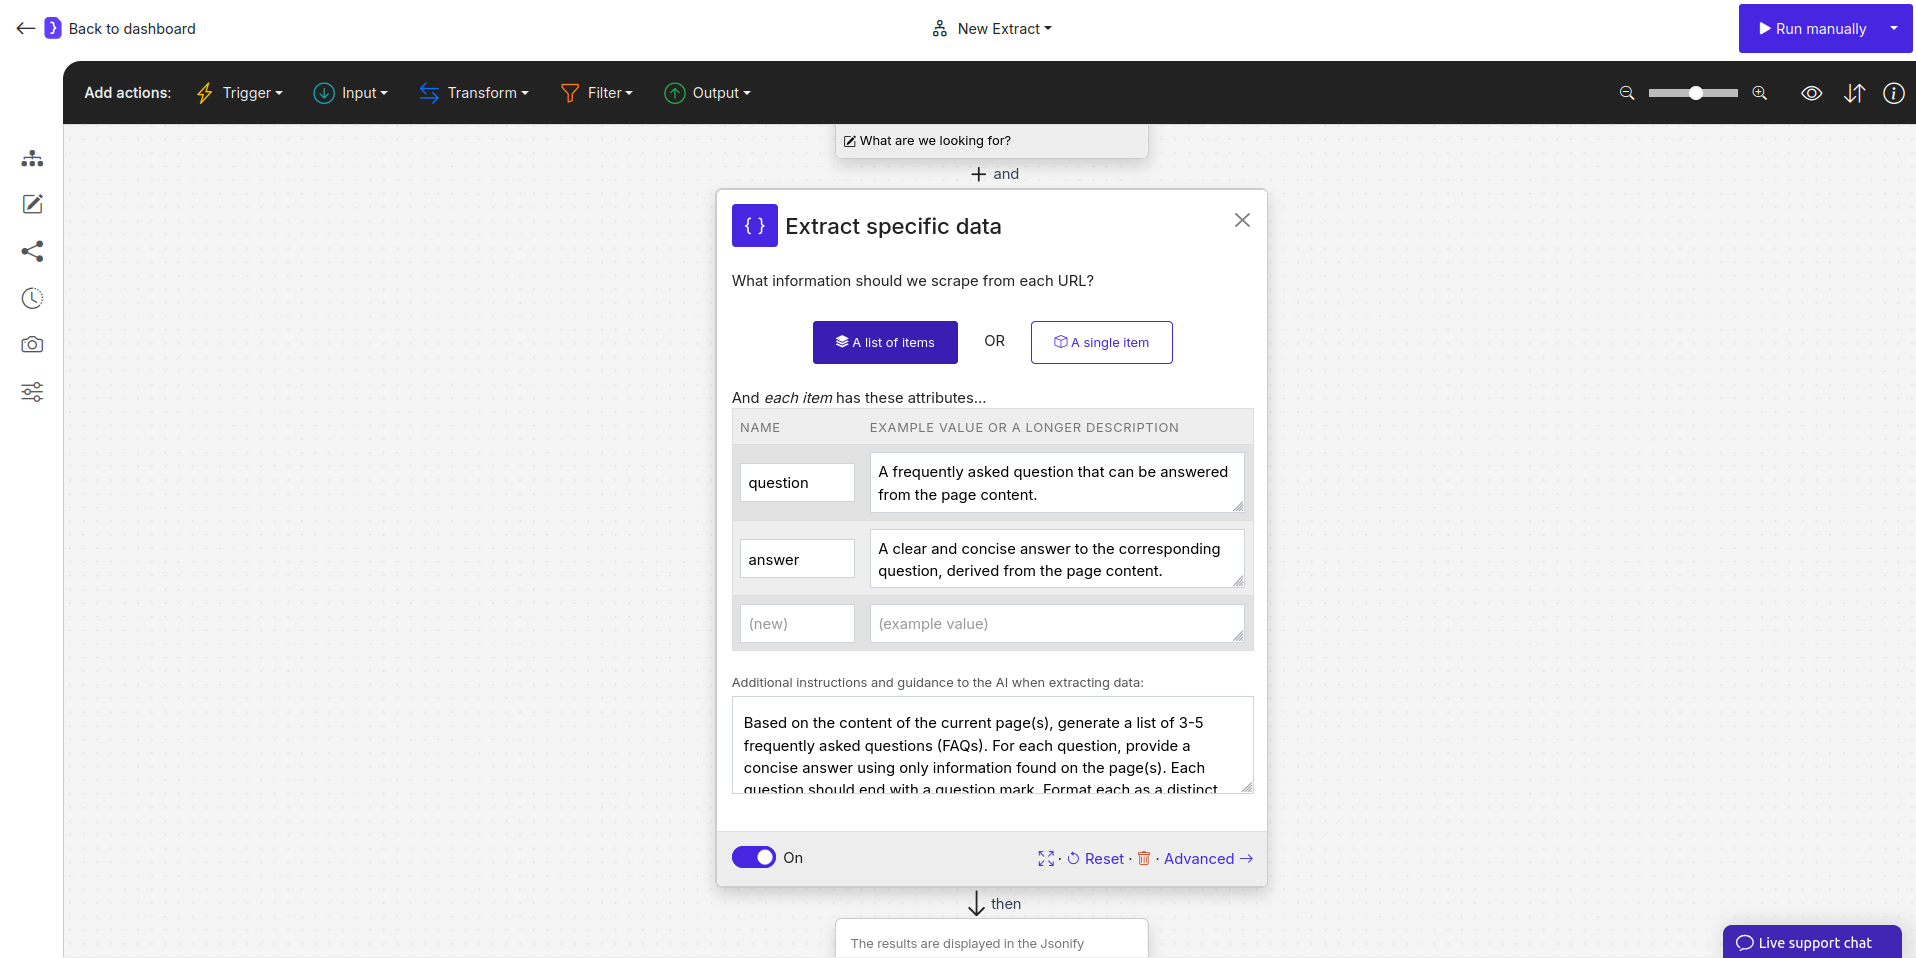
* **What information should we scrape from each URL?:** Select **`A list of items`**, as we expect to generate multiple Q\&A pairs.
* Define the attributes for each FAQ item:
| NAME | EXAMPLE VALUE OR A LONGER DESCRIPTION |
| ---------- | ------------------------------------------------------------------------------------------ |
| `question` | `A frequently asked question that can be answered from the page content.` |
| `answer` | `A clear and concise answer to the corresponding question, derived from the page content.` |
* **Add additional instructions and guidance...:** This is the crucial part for generation.
* `Based on the content of the current page(s), generate a list of 3-5 frequently asked questions (FAQs). For each question, provide a concise answer using only information found on the page(s). Each question should end with a question mark. Format each as a distinct question and answer pair.`
* You can be more specific, e.g., `Focus on questions related to pricing, features, and how to get started.`
### 4. Configure `Extract Data` Block (The Generative Step)
* This is where the FAQ generation happens. The `Extract Data` block will process the content from the page(s) visited (either directly from `Open Websites` or after `Explore Content`).
* Select the `Extract Data` block.
* **What information should we scrape from each URL?:** Select **`A list of items`**, as we expect to generate multiple Q\&A pairs.
* Define the attributes for each FAQ item:
| NAME | EXAMPLE VALUE OR A LONGER DESCRIPTION |
| ---------- | ------------------------------------------------------------------------------------------ |
| `question` | `A frequently asked question that can be answered from the page content.` |
| `answer` | `A clear and concise answer to the corresponding question, derived from the page content.` |
* **Add additional instructions and guidance...:** This is the crucial part for generation.
* `Based on the content of the current page(s), generate a list of 3-5 frequently asked questions (FAQs). For each question, provide a concise answer using only information found on the page(s). Each question should end with a question mark. Format each as a distinct question and answer pair.`
* You can be more specific, e.g., `Focus on questions related to pricing, features, and how to get started.`
 ### 5. Run Your Workflow
* Click the **Run manually** button.
* The agent will:
1. Open the initial URL(s).
2. (If used) Explore the site to gather more context.
3. For the content of the visited page(s), the `Extract Data` block will use its generative capabilities to create question and answer pairs.
### 6. Check the Results
* You'll be redirected to the current run's page.
* Once completed, click on **"View as sheet"**.
* You should see a table where each row is a generated question-answer pair.
**Congratulations!** You've used Jsonify's AI to not just extract, but *generate* structured content (an FAQ) from a website. This opens up many possibilities for content creation and summarization.
### 5. Run Your Workflow
* Click the **Run manually** button.
* The agent will:
1. Open the initial URL(s).
2. (If used) Explore the site to gather more context.
3. For the content of the visited page(s), the `Extract Data` block will use its generative capabilities to create question and answer pairs.
### 6. Check the Results
* You'll be redirected to the current run's page.
* Once completed, click on **"View as sheet"**.
* You should see a table where each row is a generated question-answer pair.
**Congratulations!** You've used Jsonify's AI to not just extract, but *generate* structured content (an FAQ) from a website. This opens up many possibilities for content creation and summarization.