> ## Documentation Index
> Fetch the complete documentation index at: https://docs.jsonify.com/llms.txt
> Use this file to discover all available pages before exploring further.
# Google Sheets
> Automatically send your structured workflow results directly to a new or existing Google Sheet.
The `Google Sheets` block is a powerful **Output** block that allows you to save the final results of your workflow directly into a Google Sheet. This is an extremely convenient way to store, analyze, and share your collected data without manual exporting and importing.
This block is typically placed at the very end of a workflow, after all data has been collected and structured.
## Prerequisites: Link Your Google Account
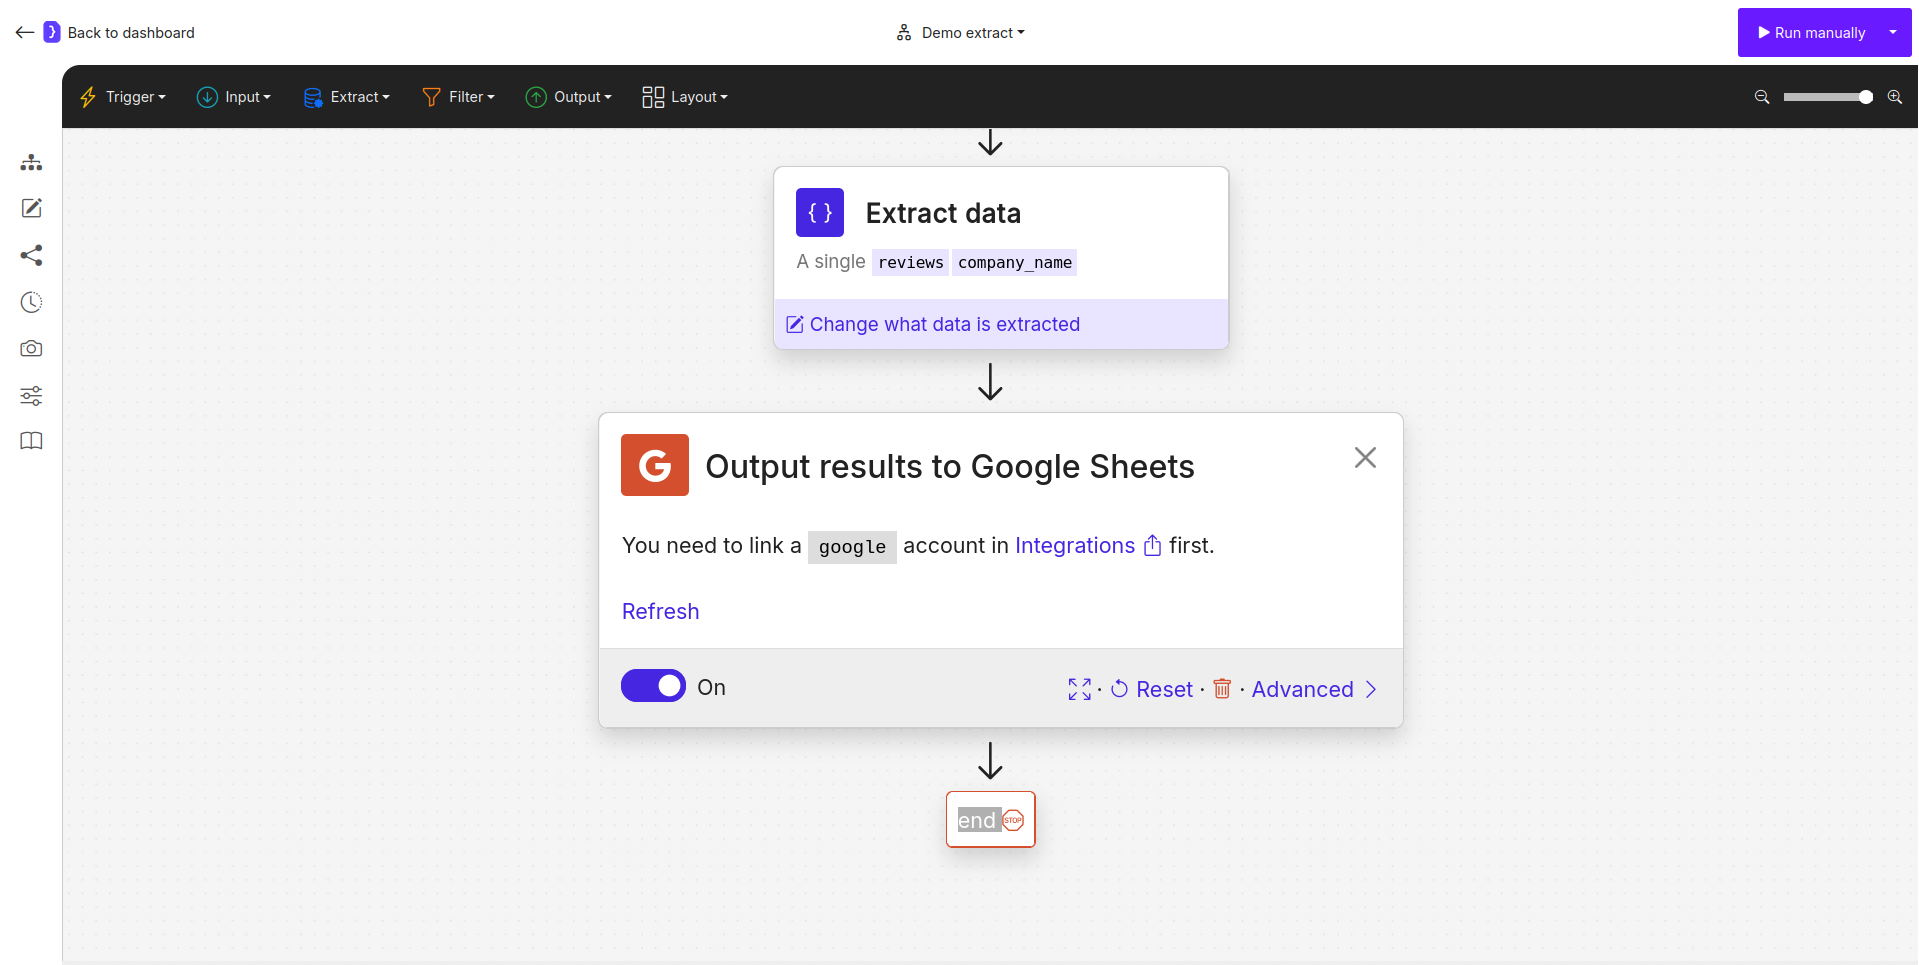
Before you can use this block, you **must** first connect your Google account to Jsonify.
1. Navigate to the **`Integrations`** section in your Jsonify dashboard.
2. Find the Google integration and link your Google account.
 ## Configuration
Once your account is linked, configuring the block is a two-step process.
### Step 1: Select Google Account
First, you must choose which linked Google account you want to use for this output. A dropdown menu will appear listing all the Google accounts you have connected to Jsonify.
## Configuration
Once your account is linked, configuring the block is a two-step process.
### Step 1: Select Google Account
First, you must choose which linked Google account you want to use for this output. A dropdown menu will appear listing all the Google accounts you have connected to Jsonify.
 ### Step 2: Choose Output Method & Data Handling
After selecting an account, you have two ways to specify the destination sheet and how data should be written.
#### Method A: Create a New Sheet (Simple)
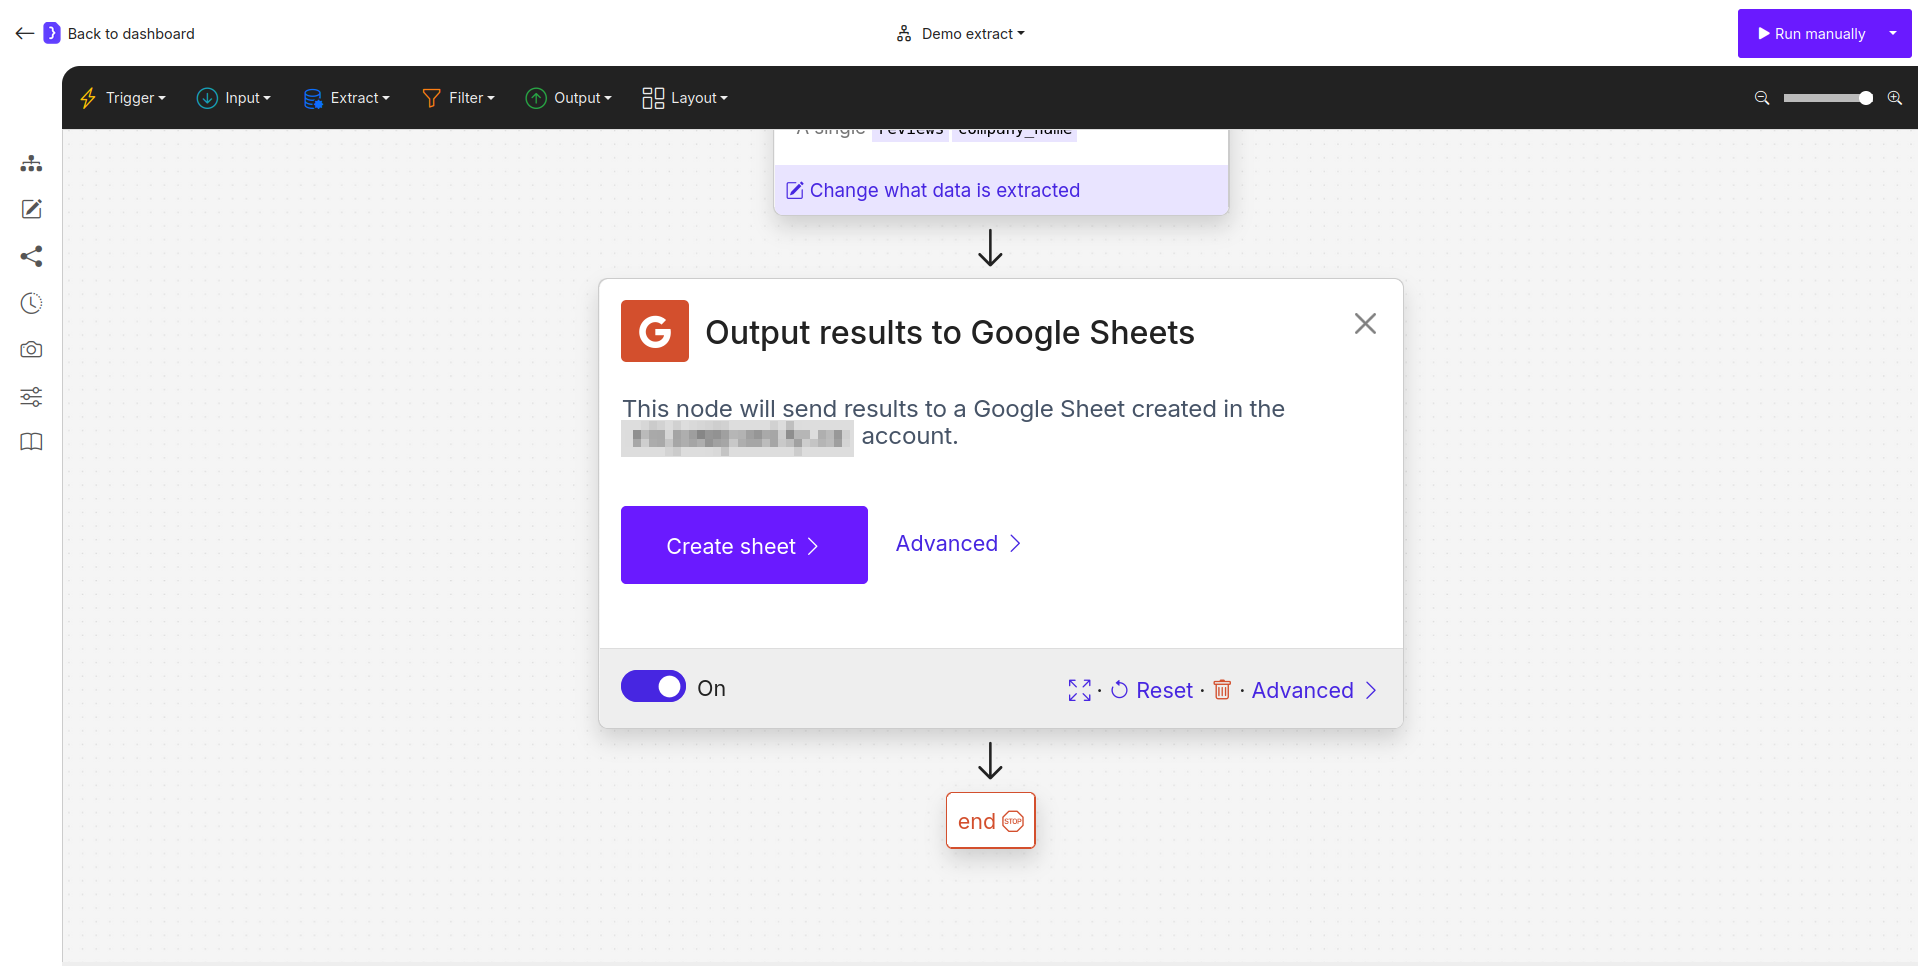
* **Create Sheet:** Click the **`Create sheet`** button. Jsonify will immediately create a **new** Google Sheet in the root directory of your selected Google Drive and link it to this block. The sheet will be named after your workflow.
* **Data Handling:** You can then specify if results should be **appended** to the sheet or if they should **replace** the existing data on each run.
#### Method B: Use an Existing Sheet (Advanced)
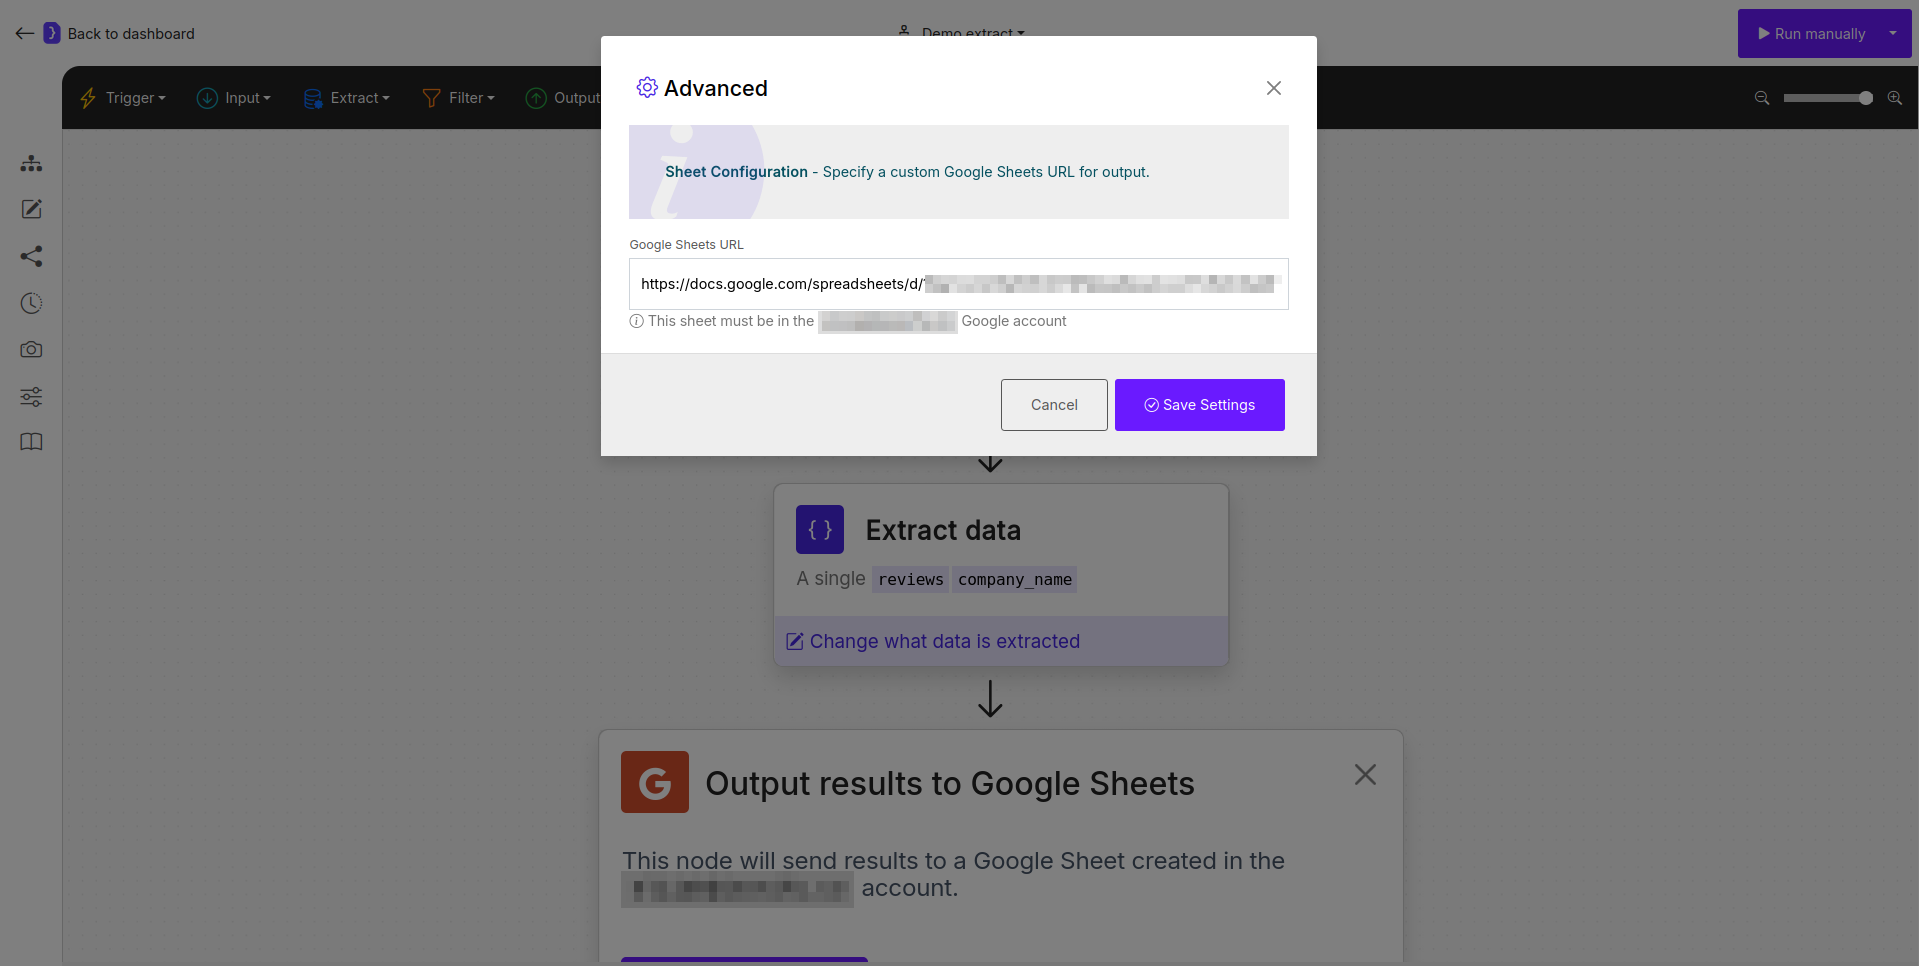
* **Specify URL:** Click the **`Advanced`** link to open a panel asking for a **Google Sheets URL**. Paste the full URL of your existing sheet here. The sheet must be accessible by the selected Google account.
* **Data Handling:** As with a new sheet, you can choose whether to **append** new results or **replace** the sheet's content with the latest data.
### Step 2: Choose Output Method & Data Handling
After selecting an account, you have two ways to specify the destination sheet and how data should be written.
#### Method A: Create a New Sheet (Simple)
* **Create Sheet:** Click the **`Create sheet`** button. Jsonify will immediately create a **new** Google Sheet in the root directory of your selected Google Drive and link it to this block. The sheet will be named after your workflow.
* **Data Handling:** You can then specify if results should be **appended** to the sheet or if they should **replace** the existing data on each run.
#### Method B: Use an Existing Sheet (Advanced)
* **Specify URL:** Click the **`Advanced`** link to open a panel asking for a **Google Sheets URL**. Paste the full URL of your existing sheet here. The sheet must be accessible by the selected Google account.
* **Data Handling:** As with a new sheet, you can choose whether to **append** new results or **replace** the sheet's content with the latest data.
 ## How It Works
1. During configuration, you establish the target Google Sheet by either clicking **`Create sheet`** or by providing a URL to an existing sheet in the advanced settings. This connection is saved before the workflow runs.
2. Your workflow runs completely and generates a final set of structured results.
3. The `Google Sheets` block executes as the final step.
4. It sends the data to the pre-configured sheet. Depending on your settings, the data is either **added as new rows** at the end of the sheet or **completely replaces** any previous data in the sheet. The column headers are created based on the variable names from your final data schema.
## Key Considerations
* **Placement:** This block should always be placed at the end of your workflow.
* **Permissions:** Ensure the linked Google account has the necessary permissions to create files in Google Drive or edit the specific sheet you provide.
* **Data Handling (Append vs. Replace):** Be mindful of your choice. **Append** is useful for collecting data over time (e.g., daily reports). **Replace** is useful for dashboards or reports that should only show the most recent run's data.
The `Google Sheets` block is the most straightforward way to get your extracted data into a universally accessible and easy-to-use format.
## How It Works
1. During configuration, you establish the target Google Sheet by either clicking **`Create sheet`** or by providing a URL to an existing sheet in the advanced settings. This connection is saved before the workflow runs.
2. Your workflow runs completely and generates a final set of structured results.
3. The `Google Sheets` block executes as the final step.
4. It sends the data to the pre-configured sheet. Depending on your settings, the data is either **added as new rows** at the end of the sheet or **completely replaces** any previous data in the sheet. The column headers are created based on the variable names from your final data schema.
## Key Considerations
* **Placement:** This block should always be placed at the end of your workflow.
* **Permissions:** Ensure the linked Google account has the necessary permissions to create files in Google Drive or edit the specific sheet you provide.
* **Data Handling (Append vs. Replace):** Be mindful of your choice. **Append** is useful for collecting data over time (e.g., daily reports). **Replace** is useful for dashboards or reports that should only show the most recent run's data.
The `Google Sheets` block is the most straightforward way to get your extracted data into a universally accessible and easy-to-use format.