The Core Concept: Parallel Rows
Instead of a single, linear sequence of blocks, you can now have multiple starting points in your workflow. Each starting point initiates a new “row” of actions. These rows run in parallel, allowing you to define different strategies for different types of input data. For example, you can process a list of websites, but use one row for sites with standard navigation and a second row for sites that rely heavily on JavaScript, before merging the results.The “Layout” Menu
The ability to create and manage these parallel rows is handled through the Layout menu in the top action bar.- Add new row: Adds another set of actions that get executed in parallel. This creates a new starting point on your canvas.
- Link actions: Connects two blocks to create a workflow sequence, even between different rows. This is the key to merging branches.
- Unlink action: Removes a connection between two blocks.
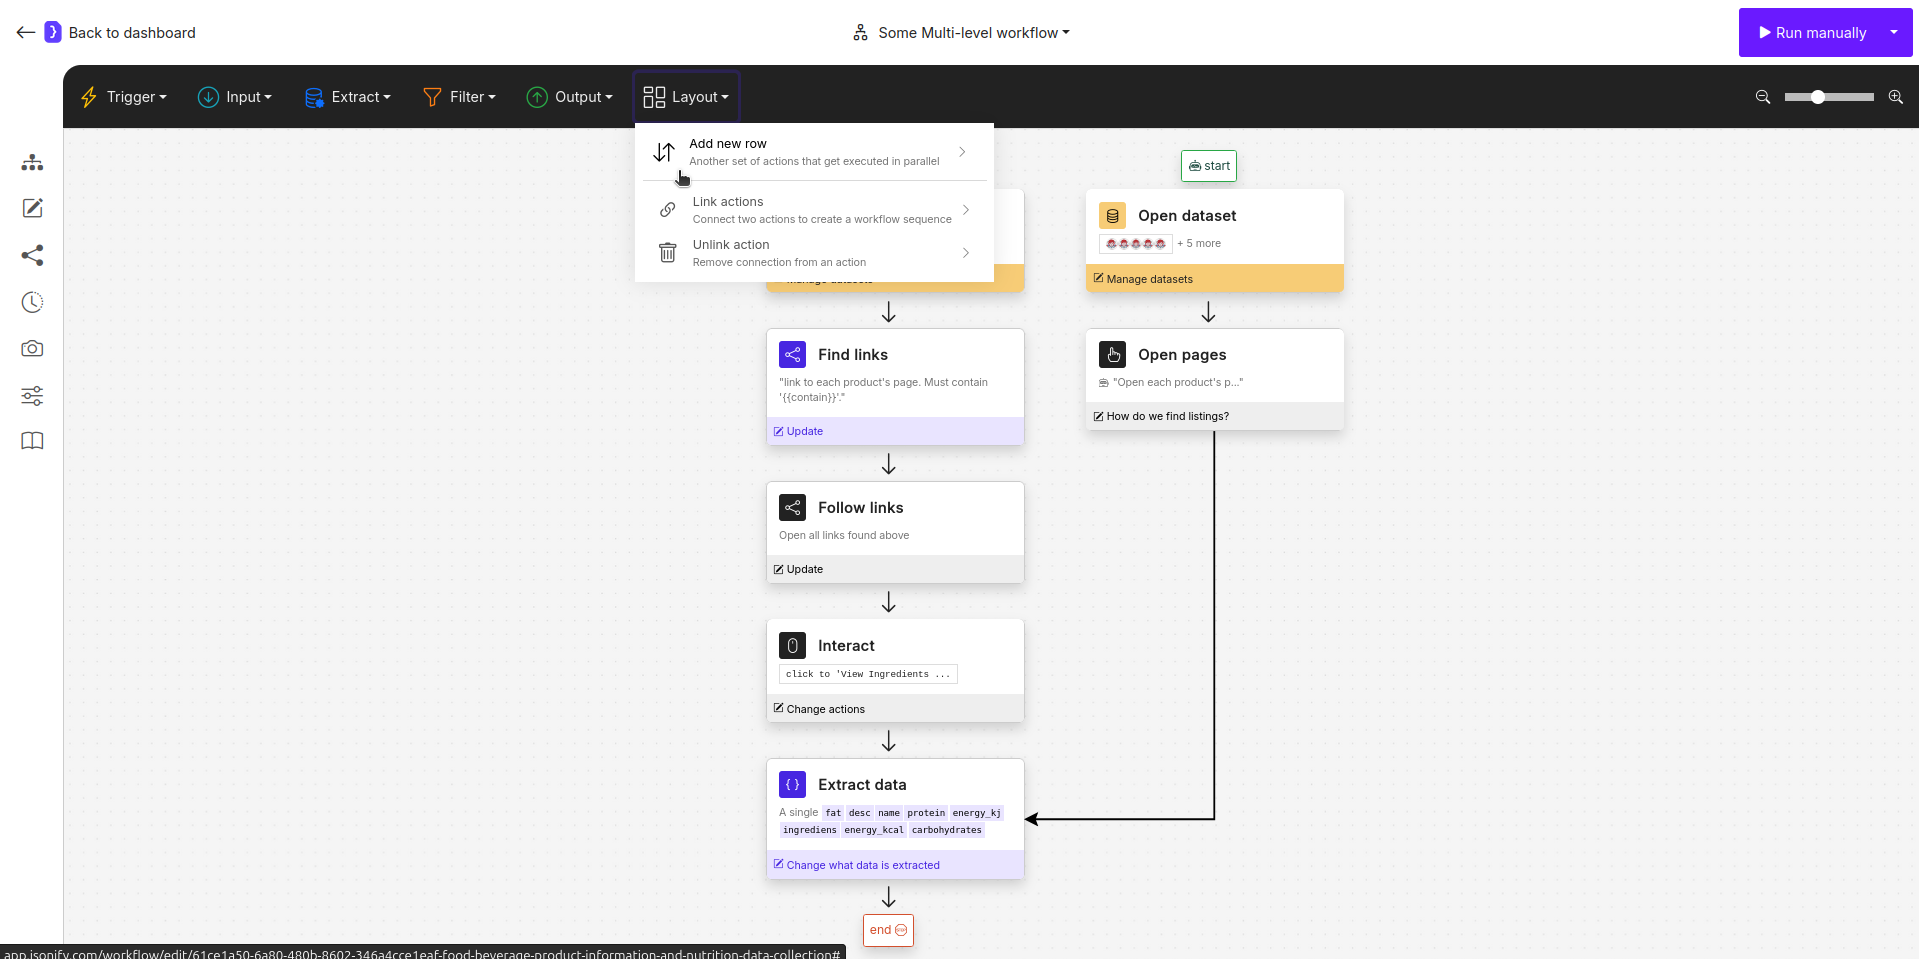
Screenshot: The Layout dropdown menu showing 'Add new row' and 'Link actions'.
How to Build a Multi-Level Workflow
Step 1: Build Your Primary Row First
For clarity and easier debugging, it’s best practice to completely build out your first, primary execution row before adding parallel ones. This ensures your core logic is working correctly.Step 2: Add and Build Parallel Rows
Once your first row is complete, go to Layout ➙ Add new row. This will create a second “start” block. Build out the logic for this parallel row. Each row can have its own data source (Open datasets, Search on Google, etc.) and its own set of transformation blocks.
Step 3: Link and Merge the Branches
This is the most critical step. To combine the data from two different rows, you link a block from one row to a block in another.- Click Layout ➙ Link actions.
- Click on the source block (the block you want to get data from).
- Click on the destination block (the block that will receive the data).
Extract Data block. When you link multiple branches into a single destination block, that block gains access to the context and variables from all incoming branches for the current item.
Step 4: Continue the Workflow (Optional)
Nothing prevents you from continuing the workflow after the merge. You can add more blocks after the unifyingExtract Data block to further process the combined data in a single, common branch.
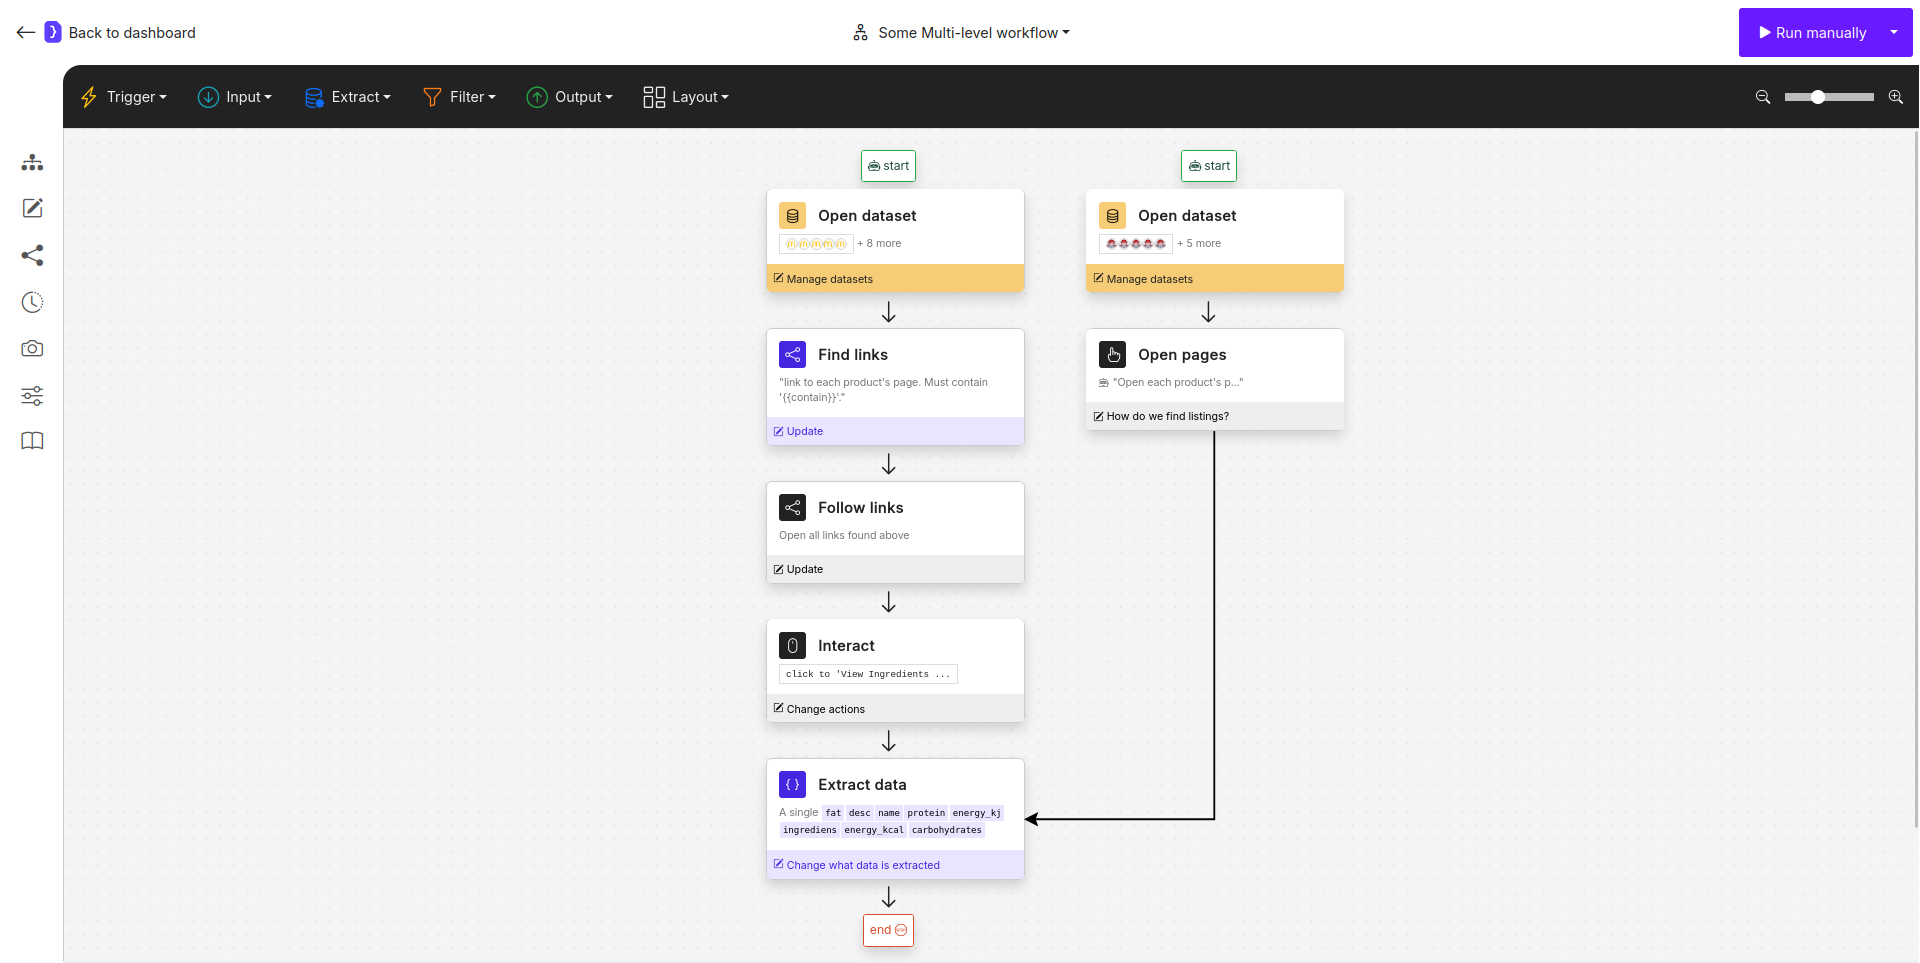
Screenshot: A multi-level workflow showing two parallel rows being linked into a single, final Extract Data block.
Example: Handling Different Website Structures
Imagine you want to scrape product data from a list of category pages. Some of these sites use standard links for their products, while others use JavaScript. You can handle both scenarios in one workflow. Your both inputOpen datasets blocks would have one row for each category page, with column: URL. Each block should have urls only for its own scenario.
- Row 1 (Standard Navigation Branch):
Open datasets: TakesURLas first input.Find Links: Finds all product links on the page.Follow Links: Navigates to each product page.Interact: Clicks on “Show specifications” to reveal hidden data.
- Row 2 (JavaScript Navigation Branch):
Open datasets: TakesURLas second input.Open sub-pages: This block is used to navigate the JavaScript-driven product list. It will open each product page. No further interaction is needed on this branch as the data is immediately visible.
- Linking and Merging:
- Click Layout ➙ Link actions.
- Link the
Open sub-pagesblock from Row 2 to a finalExtract Datablock from Row 1.
Final Extract Data Block:- This block now receives the final product page from either Row 1 or Row 2.
- You can configure it with a single schema to extract the
product_nameandprice.
- Result: A single, unified list of product names and prices, collected from websites with different navigation structures, all in one workflow run.
- Read more details about building this workflow
Key Considerations
- Parallel Execution, Sequential Merging: While the rows can process data in parallel, the final merge happens when the branches are linked into a single block.
- Data Context: The key to this feature is that a destination block inherits the context from all its linked source blocks.
- Modularity: Use rows to break down extremely complex problems into smaller, more manageable logical sequences.